

Pumpkin and Rice Stuffed Pepper
Try this fun twist on a classic for fall! These stuffed peppers are made with pumpkin and Minute® Brown Rice.


Ingredients
- 4 red, orange or yellow bell peppers
- 1 tbsp olive oil
- 1/4 cup chopped onion
- 1 garlic clove, minced
- 8 oz ground turkey
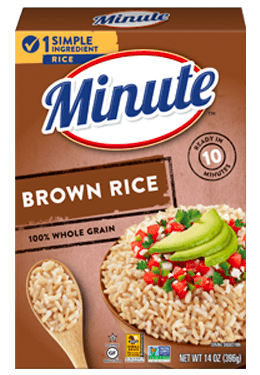
- 1 cup Minute® Brown Rice
- 1 cup chicken broth
- 1 cup canned pumpkin, unseasoned
- 1 1/2 tsp cinnamon
- 1/2 cup grated Cheddar cheese
Categories
Instructions
Even classics sometimes need an upgrade! Try something new tonight with our recipe for Pumpkin and Rice Stuffed Peppers.
Step 1
Preheat oven to 375°F. Slice peppers in half lengthwise and remove the seeds. Set aside.
Step 2
Heat oil in a medium saucepan over medium heat. Add onion and garlic, and sauté for 1 minute. Add turkey and continue to cook, breaking meat up with a spoon, for 3-5 minutes.
Step 3
Increase heat to high and add rice, broth, pumpkin, and cinnamon. Bring to a boil. Cover and reduce heat to low. Simmer for 5 minutes. Remove from heat and let stand for an additional 5 minutes.
Step 4
Place prepared pepper halves in an oven-proof baking dish. Fill peppers with turkey mixture and top with cheese. Pour one cup of water into bottom of dish. Bake for 20 minutes, or until peppers are cooked to desired doneness.
Recipe Tips
Garnish with sliced scallions.
Substitute large, cleaned Portabella mushrooms caps for the bell peppers. For a great appetizer, use small mushroom caps.
Categories
Prepping Peppers
Step 1. Position the pepper on its side. Cut the pepper’s top stem portion off using a smooth motion.
Step 2.Use a paring knife to remove the pith and seeds.
Step 3. Use the paring knife to cut through any extra pith or seeds. To remove some of the loose seeds, flip the pepper over.
Bell Peppers 101
Did you know that bell peppers are technically a fruit? They are the only type of peppers that are sweet and not spicy. All of the different colors of peppers have a slightly different taste profile as well.
Yellow-
Yellow peppers are highly sweet and taste nearly fruity. They are excellent for both cooking and eating raw.
Orange-
The least used peppers are the orange ones. They are somewhat less sweet than yellow pepper but otherwise similar. These are great for cooking and enhancing the appearance of your food.
Red-
Bell peppers with red skins are thought to be the sweetest and juiciest. They are the most mature and fully ripe.
Other Meal Inspiration
If you are looking for something else to make in the kitchen, why not try some Mexican Rice Recipe.


